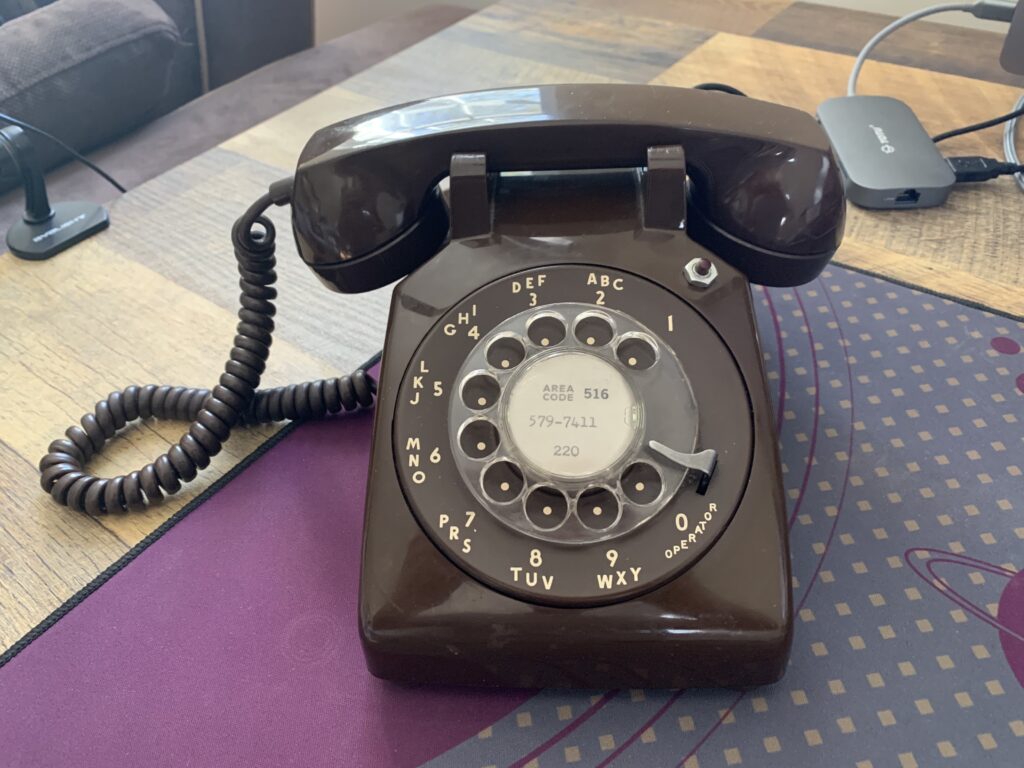
As with many other people around the world, I’ve been self-isolating for the past decade. Or at least, it feels that long. I decided to put this extra time to good use by pursuing projects and passions I would have otherwise only dreamt about.
I wanted a project which would involve hardware and software; would push me to learn new skills and technologies; and would be fun. After all, this is meant to be an enjoyable experience.

I got the idea it’d be pretty cool to repurpose a rotary dial telephone to be an input device for my computer. So, I came up with a game plan:
- Research
- Build
- Program
Research Phase
In this phase I wanted to answer the following questions:
- How much are rotary dial phones?
- Has this been done before? If so, how did they do it?
- What are the components I’d need?
Finding the phone
The first question took priority because I didn’t want to spend an astronomical amount on what’s essentially a toy. I didn’t have a clear use-case for the end product. This was more about the journey, or the learning experience, than anything else.
A quick glance at ebay revealed a wide range of prices for rotary phones. I could find something reasonable for me.
I settled on a vintage 1970s ITT Model 500 Series in chocolate brown, as seen in the picture above.
On the shoulders of Giants
I’m a firm believer that we should build on the knowledge of others. Often times, we’re not the first person to encounter the problem and, with any luck, a solution might already exist.
A few evenings of internet searching revealed a number of interesting projects on rotary dial telephones.
rotaryX: A Question and Answer Machine
Link: https://www.instructables.com/RotaryX-How-to-Hack-a-Rotary-Phone/
This project is awesome. It gives you full control over every aspect of the phone: dial, hook, ringer, and receiver.
It’s also much bigger in scope than I’d originally planned. I really only wanted to use the rotary dial part.
Rotary Contoller Dials in PC Volume
Link: https://hackaday.com/2020/06/04/rotary-controller-dials-in-pc-volume/
Sometimes, the stars align. I’d started researching on June 5, 2020. This article was published on June 4, 2020. This project was extremely close to what I’d envisioned. I wasn’t going to remove the dial from the phone and print new case, but I was confident that the components would fit inside the original housing.
Within the article is a link to the Instructables by Cameron Coward: https://www.instructables.com/Vintage-Rotary-Phone-Dial-PC-Volume-Control/
It was everything I needed to get started. I was ready to start building
Purchasing Parts
Thanks to Cameron’s instructables post, I knew I needed the following:
- A rotary phone
- Arduino Nano
- Resistors (470 ohm and 10k ohm)
- Solderable bread board
The resistors and bread board were nominal cost. The phone was $20 (plus shipping and tax) and the Arduino cost me $17. So in total, this project cost about $50.